 China Neodymium And Ferrite Magnets Manufacturer & Supplier



In the manufacturing process of micro-motors, although arc-shaped magnets (magnetic tiles) are merely small components within the motor, they have a direct impact on the motor’s efficiency, torque, noise levels and operational stability. Below is an overview of the installation process for arc-shaped magnets in micro-motors, organised according to the actual sequence of operations in a mass production workshop.
1. Pre production preparation and incoming material inspection
Prior to installing arc-shaped magnets in micro-motors, it is essential to verify the production environment, tooling and the condition of components to prevent subsequent failure caused by iron filings, oil contamination or incorrect polarity. Firstly, ensure the workstation is kept clean and use non-magnetic tooling, stainless steel clamps, copper hammers or nylon tools to prevent the magnets from attracting iron filings, which could interfere with assembly. Additionally, prepare inspection tools such as a gauss meter, lint-free cloths and alcohol.
Incoming magnetic plates must undergo inspections for appearance, dimensions and magnetic properties, including checks for defects such as chipped edges, cracks, missing sections or rust spots. Measure the radius of the curved surface, chord length, thickness and chamfer dimensions to ensure a good fit with the motor housing and that the installation clearance is appropriately controlled. Use a gauss meter to verify the consistency of magnetic flux and check the N/S polarity to prevent the mixing of magnets of different specifications.
2. Cleaning and Adhesive Application Pre-treatment for Curved Magnets
The key to the reliable installation of curved magnets lies in the preparation of the bonding surfaces. Prior to installation, the outer curved surface of the magnet (the surface in contact with the housing) must be cleaned. Typically, the surface of the magnet is wiped with alcohol or isopropyl alcohol to remove dust, grease and impurities, then dried with a lint-free cloth to ensure the bonding surface is free of residues. For adhesive application, high-temperature-resistant epoxy AB adhesive or single-component thermosetting adhesive is generally used; depending on the product structure, either spot bonding or a thin-layer spread application is selected. The adhesive layer thickness is typically controlled at around 0.05–0.1 mm; the adhesive must be applied evenly and in moderation to prevent overflow after curing, which could affect the air gap. Care must also be taken to ensure that the adhesive does not contaminate the inner curved surface of the magnet, as this could affect the motor’s magnetic field distribution.
Micro-motor curved magnets
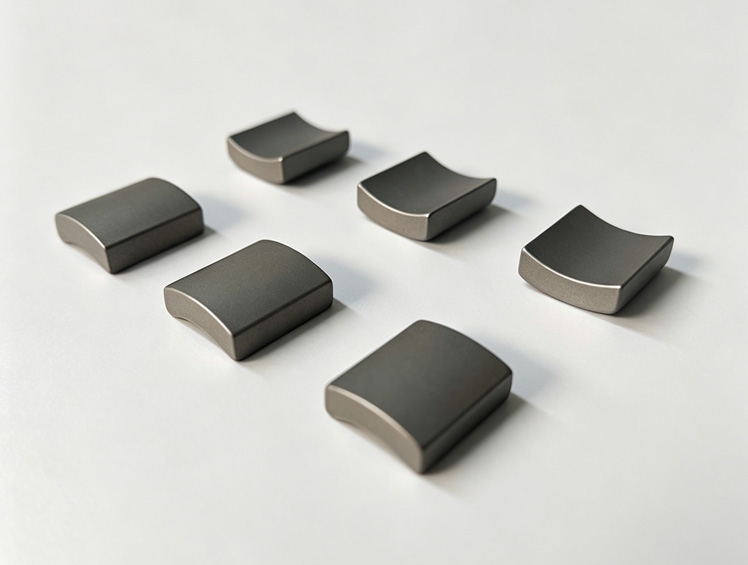
3. Positioning and Installation of Curved Magnets
The most important thing during the installation of arc-shaped magnets is to ensure accurate polarity direction and installation position. Taking two common micro motor magnetic tiles as an example, it is necessary to confirm the positioning reference of the casing before installation and fix the casing in a dedicated fixture. When installing the first magnetic tile, it is necessary to confirm the polarity direction, so that the specified magnetic pole faces the air gap side, and ensure that the arc surface is completely in contact with the inner circle of the casing. When installing the second arc-shaped magnet, it needs to form the correct magnetic pole combination with the first one, usually symmetrically distributed at 180 °. After installation, check whether the spacing between the two magnetic tiles is uniform, whether there is any tilt, curling edge or height difference.
4. Arc shaped magnet and glue curing
After the positioning of the magnetic tile is completed, it needs to enter the curing process to ensure the bonding strength during long-term operation. Generally, room temperature pre curing is carried out first to maintain the stable position of the magnetic tile and prevent displacement caused by the flow of the adhesive layer. During mass production, heating and curing methods are often used to improve production efficiency and adhesive reliability. The common curing temperature is controlled at around 80-120 ℃ based on the properties of the adhesive, and the time is about 30-60 minutes. During the curing process, it is necessary to maintain the pressure of the fixture to ensure that the magnetic tile is fully adhered to the casing. After curing, it is necessary to cool naturally to room temperature to avoid rapid cooling that may cause shrinkage and cracking of the adhesive layer. Subsequently, check for any looseness, displacement, or curling of the magnetic tile, and clean up any excess adhesive to ensure a smooth inner circle of the motor.
5. Polarity and magnetic performance testing
After the installation of the magnetic tile is completed, a magnetic performance re inspection is required to ensure that the direction of the motor magnetic field is correct. Firstly, use a Gaussian meter to detect the direction of the magnetic field on the curved surface of the magnetic tile, confirm that the arrangement of the N and S poles meets the design requirements, and avoid problems such as reverse installation and wrong polarity of the magnetic tile. Simultaneously inspect the consistency of magnetic field strength and magnetic flux to ensure stable performance of products in the same batch. Usually, it is required to control the magnetic performance deviation within a reasonable range to avoid insufficient motor torque, decreased efficiency, or abnormal operation caused by magnetic differences.
6. Final Assembly and Performance Testing
Once the arc-shaped magnets have passed inspection, the motor proceeds to the final assembly stage. When installing the rotor and armature assemblies, the uniformity of the air gap must be checked to ensure that the rotor does not brush against the stator during rotation. Subsequently, components such as end caps, bearings and brushes (for brushed motors) are fitted. Once assembly is complete, a manual rotation test is carried out to confirm that rotation is smooth, with no binding or abnormal noises. During power-on testing, the motor’s direction of rotation, speed, current and operating noise must be checked to ensure that the motor’s performance meets the design requirements.
By standardising the installation process, it is possible to effectively improve the consistency of magnet assembly in micro-motors, thereby reducing issues such as demagnetisation, magnets falling out and a decline in performance during motor operation.
Micro motor magnet product column; https://www.couragemagnet.com/micro-motor-magnets/